WPC Vs. Laminate

By Ken Ryan Via FCNews

In one corner you have the new kid on the block, WPC, or Wood Plastic Composite. In the other corner is laminate.

Screen-Shot-2016-01-18-at-2.20.38-PM-291x300

Laminate has its advantages as well. These products are bio-based and renewable—over 96% of the product is made of wood. “It is also highly scratch resistant—more so than any other flooring type other than maybe porcelain,” said Dan Natkin, senior director of residential products for Mannington.

In fact, the most commonly cited advantage of laminate among retailers is the product’s durability. That is a selling point for active households as laminate is resistant to scratches and staining. Some wood looks in laminate are so accurate even experts cannot tell the difference.

The disadvantage of laminate is its moisture sensitivity and need for transition moldings at certain intervals. The core of a laminate product acts like a sponge, absorbing moisture that causes it to expand. If there is not enough expansion in a room, the floor will buckle or the joints of the laminate will squeak as it is walked across.

Editor’s note: For the purposes of this comparison, only laminate products with 12 mil thickness and above were considered.

WPC Floor Installation

WPC Flooring Before you start
This flooring replicates the look of a natural product which has natural variations in color. For best visual effect, shuffle planks or tiles from several cartons and do not install similar planks next to one another.
FLOORING MATERIAL SHOULD BE INSPECTED FOR COLOR, FINISH, SHEEN, & QUALITY PRIOR TO INSTALLATION.
Responsibility for the suitability of Eternity flooring and accompanying products for each individual installation cannot be assumed by Eternity, since Eternity has no control over the installer’s proper application. Should an individual plank be doubtful as to appearance or dimension, the installer should not use this piece. Complaints for visual defects can only be accepted before installation. Eternity will send a replacement in a timely fashion.
While WPC Flooring is waterproof, it is not a moisture barrier. It is still a good idea to make sure concrete is cured and tested for moisture and that a moisture barrier is installed in the crawl space and even under a WPC Floor over a concrete sub-floor. Moisture won’t damage WPC flooring, but It can get in the walls and structure of a home. A couple of extra dollars and a few minutes is a small investment for the added protection and peace of mind. Use good common sense installation practices, and you will have a successful installation that results in beautiful floor.
-WPC flooring is normally loose laid without adhesive
-Store flat and fully supported during shipping and storage. WPC Flooring needs to be
acclimated in the room where the installation is to take place at a constant temperature of 68
-77 degrees Fahrenheit for a period of 48 hours prior to installation.
-Be aware that when exposed to excessive temperatures and direct sunlight, WPC Flooring may expand and contract causing problems with the locking system. Please consider these exposures when choosing your product.
-Installations in facilities where walkers and wheelchairs are used (i.e. Residential and or
extended care) or in facilities with movement of heavy displays, racks, dentist chairs, etc.
may exert extreme stress and compromise the locking system.
-Flooring should be one of the last items installed in any new construction or remodel
project.
-Do not install WPC flooring where it will be exposed to temperatures greater than 1
40degrees Fahrenheit.
The Subfloor All subfloors must be:
o Dry
o Structurally sound
o Clean, thoroughly swept and free of debris, carpet staples, oils, residue, etc.
o Level, plumb, and true to a tolerance in plane of 3/16” in 10ft. Any
unevenness over 3/16” must be sanded down or leveled. Voids or humps in the subfloor will prevent the planks from locking properly.
-Wood Subfloors must be dry and well secured. Nail or screw every 6” along joists to avoid squeaking. If not level, sand down high spots and fill low spots with a leveling patch
-Concrete sub-floors must be fully cured, at least 60 days old, and underlayment is
recommended between concrete and ground. If necessary grind high spots down and level low spots with a leveling compound.
-Resilient tile, and sheet vinyl must be well bonded to subfloor, in good condition, clean, and level. When installing over ceramic tile, first level with a fast setting cement based polymer modified patching compound. Do not sand existing floors as they may contain asbestos.
Measurements:
-Because houses and buildings as well as adjacent hardwood or laminate floors expand and contract, Eternity recommends leaving a ¼” expansion gap between the perimeter walls and any adjacent hardwood floor.
-Agree with the client on which direction the floor boards should run since this influences the visual size ration of the space. Installation parallel to the longest wall or the main light source is recommended for best visual effects.
-Pre-plan the floor by measuring the room first. If the width of the last row is less than 2”
(5cm) saw the first and the last plank in equal width
-Snap the lines on the substrate to identify the layout reference points, tiles should be set
using this reference to ensure they are aligned and will lock together correctly.
-In large areas where flooring will span in excess of 40’ long, an expansion gap should be
used. Otherwise place expansion space in room-narrowing and in the door-rebate. Cover
the expansion space with suitable coverings.
Installation
-WPC Floors can have slight color variations in between production runs. Before starting the installation, it is best to check the production run number. If you find that you have cartons from different production runs, it is highly recommended that you open the cartons and install a mix of planks from each different production run on your floor. This will result in a
more natural looking floor.
-DO NOT
install your WPC Floor over soft subfloors such as carpet or foam underlayments.
-The use of pull bar tapping block is recommended to ensure a successful install
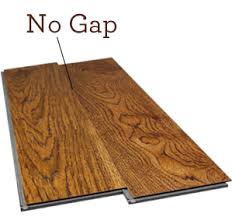
-WPC Flooring provides a very tight fit. Proper care must be used to ensure all seams are
tight at end of install. An unprofessional installation or use of improper tools can result in damage to the click profiles.
 WPCBLOGpics
First row:
o Diagram #1 Start with the first sheet in the left corner of the room, tongue-side facing out from the wall to the length and to the right on the width. Work from left to right.
o Diagram #2 Position the following sheets as an exact extension of the first one.
o Cut to fit the last sheet of the row. To do this you can use a utility knife to score the surface at the appropriate point and then break the title over an edge. A laminate cutter or miter saw can be used as well.
Following rows:
o Diagram #3 Begin the second row with the cut-off end to start the next and subsequent
rows. Allow at least a 6” stagger for the end seams. For positioning the planks together,
starting with the first tile in the row, raise the tile at a 45 degree angle, insert the
length ways tongue into the length ways groove and lower the sheet while holding the two together until they are flat and tightly together. Close the join using hand pressure or
tapping block or pull bar.
o Diagram #4 Lever the next sheet in place from the front side so that only a very short
distance remains for it to be pushed into the length ways connection.
o Diagram #5, 6, 7 Raise the sheet slightly and push it into the length ways tongue, first close to the front connection then the rest. Make sure seams are tight on ends and sides using pull bar or tapping block before proceeding. Continue the installation to the last row of sheets, as described.
o How to shorten door frames: Position a lose sheet face down close to the door frame and cut with a jamb saw.
o People can walk on the flooring immediately after the installation. Remove the wedges. Nail or screw moldings to the wall, never to the floor

Is underlayment necessary to install Vinyl Plank flooring?

Via Best Laminate


When installing new flooring, it is important to know if you need underlayment.  Unlike laminate flooring, most vinyl floors are designed to lay right on the sub-floor. But there are a few exceptions to the rule, but with all flooring installations, there are a few things that are required no matter what floor you install.

Before you install vinyl floors, always make sure your sub-floor is:

  • In good condition
  • Free of damages
  • Smooth
  • Clean & Dust free

Not all vinyl floors are installed the same way. Take a careful look at what you purchase so you know if you need underlayment or other accessories to make you install last for years.

Vinyl Flooring Underlayment Differences:

Click Lock Vinyl Plank Flooring

Click Lock Vinyl flooring has a locking system that is similar to laminate flooring. It is recommended to use a vapor barrier underlayment, especially with a concrete subfloor. If you are looking to increase the height of your floor, or have more cushion, an underlayment can be used, but is not necessary.

index

Glue Down Vinyl Plank Flooring

Glue Down Vinyl will only require a sub-floor that is debris free. Because you glue this floor to the sub-floor, minor imperfections or sloped flooring is no problem!

vinylgluedown


Loose Lay Vinyl Plank Flooring

Loose Lay Vinyl is the easiest to install. These can be installed without glue or a locking system right above the sub-floor. While this floor does sit on top of the subfloor, it does not need an underlayment. This vinyl flooring is designed to be cut to fit perfectly against the wall. No expansion gap needed!


Style: "222"

Style: “222”

Is installing hardwood flooring with dogs a terrible idea?


(Via Best laminate)

Hardwood flooring is stunning. It has a rich finish and beautifully natural appeal. Still, its natural allure does bring a few downsides.

The wood itself is softer than most other flooring, so it’s easily scratched or dented. Unlike laminate or vinyl flooring that mimics the look of hardwood, hardwood doesn’t have the protective layer on top. Instead, it has a sealant that helps protect against scratches, but it does not fully stop them from happening.

Manufacturers know this, which is why they do not cover pet damage under warranty. It is too hard to fully prevent.

Here are a few protective measures you can take to help keep them from getting scratched up.

Add Area Rugs to Your Floors 

It sounds like your pets skid across the floor in similar locations time and time again. You can add an area rug to these locations to stop them from digging in their claws to the hardwood while they slide.

Remember, hardwood will change color depending on sun exposure over time. Make sure to move your rugs regularly so you don’t risk having uneven tones.

Keep Your Pets Nails Trimmed 

You might already trim your pet’s nails, but with a hardwood floor, regular manicures and pedicures are vital. Keep them trimmed regularly by setting a schedule. Taking them for a walk on the road can also help to keep the nails trimmed!

Avoid Putting Water or Food Bowls on the Hardwood 

Nails are only one concern. Putting water or food bowls on the hardwood can also cause damage. If you must put their bowls on the hardwood floor, clean up any spills immediately. You might also want to invest in a bowl that sits slightly above the ground so your dog cannot slide it across your floors while eating. Another option is to purchase a non-skid bowl mat that is much larger than your pet’s food bowl to catch any spills.

Accidents

Accidents happen with pets, sometimes more than others. These can be a big threat to hardwood floors, especially if they are not cleaned up immediately. Even if there is an accident on a rug, above a hardwood, it can still damage and stain the hardwood if it seeps through the material.

Refinishing

A nice option with hardwood floors is the ability to refinish them over time. If your pets do end up damaging and dulling your hardwoods, you can always choose to refinish them. This will sand away any damage and create a stunning new look. You may even opt for sealing the floors with a more protective barrier.

Lumber Liquidators Pleads Guilty To Selling Wood From Siberian Tiger Habitat

Lumber Liquidators Pleads Guilty To Selling Wood From Siberian Tiger Habitat

October 26, 2015

lumber-liquidators-pleads-guilty-to-selling-wood-from-siberian-tiger-habitat.jpg

Lumber Liquidators plead guilty on Thursday to selling wood from Siberian tiger habitats, federal officials said, according to CBS News. The flooring company admitted that they had illegally imported hardwood flooring from China that had been made with illegally logged lumber from the habitats of endangered Siberian tigers and Amur leopards. “Lumber Liquidators’ race to profit resulted in the plundering of forests and wildlife habitat that, if continued, could spell the end of the Siberian tiger,” Assistant Attorney General John Cruden for the Justice Department’s Environment and Natural Resources Division said in a statement. The company agreed to pay more than $13 million in fines when they entered their plea in a federal court in Norfolk, Virginia on Thursday, October 22. Company pleads guilty to using timber illegally harvested from Siberian tiger habitat: https://t.co/AJQSWP8Qco pic.twitter.com/i6JY8dGMlX — US Fish and Wildlife (@USFWS) October 23, 2015 Earlier this month, Lumber Liquidators was charged with one felony count of importing goods through false statements and four misdemeanor violations of the Lacey Act. According to ForestLegality.org, the Lacey Act is a “1900 United States law that bans trafficking in illegal wildlife.” The Act was amended in 2008 to include plants and plant products, which includes timber and paper. The website reports that the Lacey Act is the world’s first ban on trade in illegally sourced wood products. Lumber Liquidators plea marks the first time a major US corporation was found guilty of smuggling wood under the Act. “The illegal timber trade represents a grave threat to the welfare and conservation of critically endangered wild tiger populations, and we applaud the Department of Justice for working to protect the habitats of wildlife,” Elizabeth Hogan, U.S. Oceans and Wildlife Campaign Manager, World Animal Protection, said in a statement. According to WCS Russia, there are only about 500 Siberian or Amur tigers are left in the wild, with 95 percent of them being in the Russian Far East. The Amur leopards are considered the rarest big cat in the world, and there are currently an estimated 57 of them left in Russia. Lumber Liquidators guilty of illegally importing timber from tiger habitat. Our story: https://t.co/q3R37UGIVV pic.twitter.com/6WHDsxRNKD — Sierra Magazine (@Sierra_Magazine) October 22, 2015 CBS News reports that Lumber Liquidators has 370 stores in the United States, with their headquarters located in Toana, Virginia. Last year, the company reported $63.4 million in income on sales of $1.1 billion. On Thursday, their stock fell 1.7 percent to $15.28. Lumber Liquidators’ complicity in the illegal timber trade was first uncovered by the Environmental Investigation Agency. According to their report, the company “committed systematic fraud and imported large quantities of illegal timber from the Russian Far East and other high-risk countries.” According to Mongabay, investigators with the Environmental Investigation Agency posed as timber buyers in Russian Far East and then followed the illegally logged wood to Suifenhe, a town on the border in China. While there, they spoke to officials at a company called Xingjia Economic and Trade Corp., which admitted they were involved in the illegal logging. They also admitted that they had been paying bribes to the government to “look the other way.” The investigators then learned that Xingjia’s largest trading partner was Lumber Liquidators. EIA’s Kate Horner said she actually observed the products being wrapped in the company’s packaging. She said she believes the company knew what was going on and it surpassed “simply failing to perform due diligence to ensure that illegal timber wasn’t making its way into the hardwood products it was selling to unsuspecting consumers in the U.S.” Lumber Liquidators pleads guilty to environmental crimes, agrees to pay more than $13M » https://t.co/V0zjJROYC7 pic.twitter.com/RVbMlGRvO2 — CNBC (@CNBC) October 22, 2015 “One would surmise that Lumber Liquidators had to have known, given how egregious the illegal logging was, and how readily [Xingjia] admitted to their illegal practices,” she said. “In addition to the fines and penalties imposed as part of this deal, this compliance plan will radically alter the way the company sources wood products,” Horner added. “The real cost to the company will come from having to forego cheap, stolen wood in its supply chain while the Department of Justice looks over its shoulder.” [Photo by Ken Wolter / Shutterstock.com]

http://or-politics.com/news/lumber-liquidators-pleads-guilty-to-selling-wood-from-siberian-tiger-habitat/134555/

How to dispose of laminate flooring

Laminate flooring is made of 80% wood. That means that much of it can be recycled. Before you start filling your dumpster, there are a few things to consider.

What type of waste do you have?

Basic flooring installation supplies can be safely thrown away in your dumpster when you are finished. No extra measures for clean up required! Laminate planks can also be burned due to the percentage of wood it is comprised of.

Flooring debris is another story.

Did you rip up old flooring to make room for the new?

If so, you probably have a large pile of debris ready to be thrown away, such as carpet. We suggest taking this to the landfill instead of filling your dumpster with it. This is especially true if the flooring you tore up was any type of hardwood or laminate, which can be recycled.

Featured image

The landfill is able to recycle the flooring, which is better for the environment. As much as 85% of laminate flooring can be put back into production. This often comes out in the form of wood chips or fibers.

Are you keeping enough leftover planks?

The good thing about laminate flooring is that it’s so easy to replace damaged planks. Keeping 5% – 10% of your laminate flooring on hand will help you switch out any planks that might become damaged due to unexpected flooding, scratches, or chips.

Many times, manufacturers stop making certain styles of laminate flooring. If that’s the case with you, you might not be able to buy your exact style of laminate when you need it. Having your extra supply on hand will help you avoid the need to replace all of your floors.

How to prevent hardwood flooring from fading

Via Best Laminate

Featured image

As much of an eyesore as the varied colors might be, it’s completely natural to have your hardwood flooring change colors over time. The portion of it that’s exposed to the light will fade as the UV rays do their damage. The portion that’s hidden safely under your area rugs will stay the bright, shiny, darker version of the hardwood floor as you remember it when you first had it installed.

It’s a cruel trick of nature. At this point, you might not be able to do too much to hide the large discoloration. However, rest assured that over time, it’ll fade too, evening out the color in your room.

What You Can Do Going Forward

Going forward, we suggest rotating your rugs and furniture from time to time. This will eliminate the risk of your flooring changing color in certain areas. Over time, the floors will get an equal amount of sunlight exposure in each area. Also, invest in some blinds or curtains to help dim the harsh rays. This will even out the fading and keep your hardwood flooring looking consistent.

Featured image

We also suggest using a regular cleaning program to maintain your floor’s appearance in the areas exposed to the light. Here are a few tips to get you started:

  • Use doormats to collect fine sand and dust. This can scrape your floors making them look worn out faster.
  • Regularly sweep or dust mop your floors to get the scratch-causing debris out of your room.
  • Avoid all harsh chemicals. This can strip your hardwood floor of its shine and appeal.
  • Never move your furniture by dragging it on the ground. Ask someone to help, or use felt sliding pads.
  • Avoid walking on your floor in any type of shoes, especially those with a high heel.
  • Do not leave your flooring in direct sunlight for a prolonged period of time.

Featured image

Having a noticeable area where part of your floor is more weathered than the rest is frustrating. By regularly updating your room’s furniture and area rug arrangements, you can avoid this doing longer term damage while keeping your floors looking their best for years to come.

Pros and cons of vinyl flooring

Via Best Laminate

Pros

Cons

100% Moisture Resistant Difficult to remove if glued down
Commercial Grade Wear Layer Can be punctured with very sharp objects
Fiberglass Reinforced Does not have a wood feel like laminate or hardwood
Antistatic Not biodegradable
Can be used on cement, granite, tile, laminate and other flat surfaces
Can be glued down
Natural wood look
Low maintenance
Affordable
The biggest advantage of vinyl plank flooring is the fact that it is 100% water resistant. This makes it the ideal flooring solution for spaces such as basements, kitchens and bathrooms. In addition, vinyl plank flooring is very durable with commercial grade wear layers and fiberglass reinforcement. Vinyl can be installed on nearly any subfloor, and the thicker floors are very forgiving to imperfect subfloors. Luxury vinyl plank flooring can also be glued down which is something many home owners look for. The affordability, durability and natural wood look make vinyl plank flooring a great option for busy spaces without the price tag of authentic wood.

As with any product, there are disadvantages associated with vinyl plank flooring. If you choose to glue down your vinyl plank flooring, the removal process is known to be very difficult. If you are installing vinyl as a temporary solution, it is recommended you avoid glue to make the removal as easy as possible. Vinyl plank flooring is very durable, however it can be punctured with very sharp objects. For example, if a kitchen knife gets dropped head on the vinyl plank flooring, it is likely there will be a visible scar. Vinyl plank flooring also does not have the wood feel of laminate or especially hardwood. When walking on vinyl flooring with shoes, it does not have the rich wooden sound a natural wood floor would. Unfortunately, vinyl plank flooring is not biodegradable and can be very difficult to recycle. For environmentally conscious consumers, laminate flooring might be a better option since is it fully recyclable.

How a moisture barrier works

How a Moisture Barrier Works

Featured image

A moisture barrier offers a layer of protection between the flooring and the moisture vapor. It stops water from reaching your floors, causing them to expand, buckle, or cup.

Many people use this in addition to the underlayment, which cushions the floors. In fact, quite a few underlayment options have a moisture barrier built in. Because you’re installing your floors above grade, you do not need the maximum level of protection against moisture (since it’s not as high of a risk). You can use an underlayment with built-in moisture without worry.

It’s equally important to use the Goldilocks rule in underlayment: install just the right amount.

You already know that installing too little underlayment and moisture barrier protection is a risk. Did you also know that installing too much can be equally risky?

Too much material being install underneath your floors can make the joints weaker, causing them to separate.

To find out which type of underlayment is right for you, and how much you’ll need, talk to one of our flooring experts. We’ll get to know more about your space, the hardwood you’re using for installation, and your lifestyle. With that information, we can give you the best recommendation for your home.

Featured image

Laminate flooring FAQ’s

Via Best Laminate

As a family with kids and pets, what should we look for when shopping for wood laminate flooring?

Nursery Room

The AC Rating of laminate flooring is something you will want to look at closely. We carry several brands that offer an AC Rating that is recommended for heavy traffic areas, and even commercial areas. The minimum for general residential use, would be an AC3 rated floor. However, if you have large pets and kids that tend to be bouncing off the walls and floors, you may want to consider an AC4 rated floor. AC4 rated floors are rated for general commercial use, such as stores and shops where there will be lots of foot traffic from customers. This slightly higher rating will usually come with a longer warranty too, since you are purchasing a high quality product.

You should read the warranty carefully as it won’t cover some problems, but if you don’t want to pull up your floor in 10 years because it is worn out, consider a floor that offers a 25 year to lifetime residential warranty. If a company is willing to replace manufacturing defect flooring for a LIFETIME you bet they’re sure they have a sound product. Laminate flooring is an investment in your home, one that you will enjoy for many years.

How do I clean my laminate floor?

Armstrong Coastal Living White Wash Walnut Handscraped

Laminate flooring is known to be low maintenance and easy to clean. A quick sweeping or light mopping is all it takes to maintain your flooring. Use a solution of water and vinegar to mop your flooring. This natural method will kill bacteria and mold, leaving your home naturally fresh and clean.

How much extra flooring should I get when buying new flooring?

For normal rooms, the golden rule is to purchase 5% extra flooring material due to damaged planks, wrong cuts, and the like. For kitchen installations and when you install laminate tiles, you will want to order up to 10% extra, since flooring may be damaged due to water leaks or other mishaps.

What tools do I need for installation?

Continue installing your flooring

The 5 Essential Tools for Laminate Flooring Installation are:

  1. Measuring tape
  2. Reversed jigsaw blade with teeth pointing down
  3. Dry erasable marker
  4. Undercut saw
  5. Tapping block
  6. Pull bar

Laminate flooring is a DIY lover’s project. Many homeowners feel a great deal of accomplishment upon installing a new laminate floor in their home. Keep in mind, each house and installation situation is different.